JavaRanch Cattle Drive - Servlets
Go to www.orionserver.com and download
the latest version of the orion server. Install it on your computer.
At the time of this writing, I downloaded orion2.0.5.zip and unzipped the file
into c:\ which created c:\orion. I copied tools.jar from my JDK into
c:\orion (a little something that orion requires). I then activated the server
with the following commands at a DOS console:
        cd \orion
        java -jar orion.jar
Orion is now installed and running!
Direct your browser to http://localhost,
and you should see a message like
"Orion Application Server - Up and running". You have now verified that the
orion web server is running on your computer! Go ahead and tinker with some of
the demo stuff under "JSP examples" (a JSP is a servlet turned inside out -
we'll be learning about JSP's a little later).
When you direct your browser to http://localhost,
you are viewing a file called index.html that is stored in the
c:\orion\default-web-app directory. Take a look at it if you want.
You'll see some text that you don't see when looking
at the file through the browser. Those are called "HTML tags".
We'll talk about those more later.
Make sure you can create your own web pages:
Create a new file called "moo.html" in the default-web-app directory:
C:\orion\default-web-app\moo.html. Put the text
"A moo moo here and a moo moo there ... " in the file and save it.
Now direct your browser to
http://localhost/moo.html -
do you see the message?
Congratulations, you are now a web author. :)
Orion comes with some demo servlets. Let's make sure that the servlet server
is working by accessing one of them. Direct your browser to
http://localhost/servlet/DateServlet -
if you see the current date and time, the servlet server is working.
Make sure you can create your own servlets. I do my java development in my
c:\java directory, and I suggest that you do the same.
Copy the following code to c:\java\BeeServlet.java:
    import java.io.* ;
    import javax.servlet.http.* ;

    public class BeeServlet extends HttpServlet
    {

        public void doGet( HttpServletRequest request , HttpServletResponse response )
        {
            response.setContentType("text/html");
            try
            {
                PrintWriter out = response.getWriter();
                out.println( "a-buzz-buzz ..." );
                out.close();
            }
            catch( Exception e )
            {
                System.out.println( "cannot get writer: " + e );
            }
        }

    }
Go to the DOS console that is running orion and press control-C.
That stops the server.
Download the J2EE SDK(Java 2 Enterprise Edition Software Development Kit)
from Sun, and install it. It is a supplement to the JDK you already have
installed. You need to include the javaee.jar in your classpath.
Compile and copy BeeServlet.class to
c:\orion\default-web-app\WEB-INF\classes\BeeServlet.class, and
restart the server as before. Now direct your browser to
http://localhost/servlet/BeeServlet -
do you see the message?
Add "servlets" to your resume. :)
HTML
An HTML file is a text file where some of the text is interpreted by the
web browser to do different things.
The text
this is a sample of <b>bold</b> text.
Is shown in web browsers as
this is a sample of bold text.
<b> and </b> are called HTML tags. <b> defines where boldface
begins and </b> defines where boldface ends. Most HTML beginning tags
have a matching ending tag.
When you create an HTML file, it is considered good practice to put <html>
at the top and </html> at the bottom. Inside of those tags, you will
usually have a <head></head> pair and a <body></body> pair.
The meat of your web page goes within the body tags. The title that
usually appears at the top of your browser goes inside of <title></title>
tags inside of the head tags:
        <html>
        <head>
          <title>my title</title>
        </head>
        <body>
          my web page
        </body>
        </html>
Some other useful tags include:
         <p></p>        Designate a paragraph.
         <br>           Force a line break.
         <hr>           Horizontal rule.  Makes a line to break stuff up.
         <h1></h1>      Header size 1 - makes your text very large
         <h2></h2>      Header size 2 - not quite as big as h1.
         <pre></pre>    Preformatted text.  Good for showing source.
         <ul></ul>      Unordered list.  Good for indenting subtext.
Play around with these. More HTML will be introduced with the assignments.
For a complete tutorial on HTML, visit
The W3 HTML School.
Servlets
Servlets are Java's answer to providing dynamic, server based web content.
Getting data from a browser can be pretty scary. Fortunately, the
servlet server protects you from that nightmare.
Take another look at the code we used to test the Orion servlet server:
      import java.io.* ;
      import javax.servlet.http.* ;

      public class BeeServlet extends HttpServlet
      {

          public void doGet( HttpServletRequest request , HttpServletResponse response )
          {
              response.setContentType("text/html");
              try
              {
                  PrintWriter out = response.getWriter();
                  out.println( "a-buzz-buzz ..." );
                  out.close();
              }
              catch( Exception e )
              {
                  System.out.println( "cannot get writer: " + e );
              }
          }

      }
HTML files are typically served via HTTP (HyperText Transfer Protocol). There are
two types of HTTP requests that we need to know about: GET and POST. GET is
what you normally use when you type a URL (Uniform Resource Locator -
sometimes called a web address) into your browser and press enter.
POST is what is usually used when you fill out a form on a web page and submit it.
When you write a servlet, you typically implement a method called doGet()
if you are going to intercept HTTP GET requests, and doPost()
if you are going to intercepts HTTP POST requests.
In the example above, we are intercepting a GET request.
"out" is where we send the new web page for our user to view in their browser.
In this case, it's just text with no HTML markup.
If the user or the browser had any extra information for us, we would be able
to find it by using request.getParameter().
Assignment Servlets-1 (NowServlet)
Purpose: To learn to get a servlet working from editor to web browser and
verify the servlet's dynamic behavior.
Write a servlet that shows the current date and time.
In other words, I want you to feed the following URL into your browser:
http://localhost/servlet/NowServlet
and see the current Date and time. The following format is acceptable:
Sat Dec 09 05:13:04 MST 2000
Pressing refresh or reload should show updated information.
Notes:
"localhost" is a common way to refer to your own computer.
Your server is configured to recognize requests for things in the "/servlet/"
directory as requests to pass on to a servlet. It will also attempt to route
these requests to your C:\orion\default-web-app\WEB-INF\classes directory so
make sure you put your servlet class file there.
Instructor's solution: 23 lines
Packages
Orion allows you to put your servlets directly into the directory mentioned
above. Some other servers require you to package your servlets before they can
be run. Usually classes that are related are in the same package.
For example, most of the basic Java classes are in the java.lang package.
By convention, the package name begins with the domain name reversed,
so we will use the package com.javaranch.drive for these assignments.
Let's put BeeServlet into a package by putting a "package" statement at
the top of the source file.
      package com.javaranch.drive ;

      import java.io.* ;
      import javax.servlet.http.* ;

      public class BeeServlet extends HttpServlet
      {

          public void doGet( HttpServletRequest request , HttpServletResponse response )
          {
              // the rest of the code
          }

      }
Now the fully qualified name of BeeServlet is com.javaranch.drive.BeeServlet.
Put the source file in a directory structure that matches the package name:
c:\java\com\javaranch\drive\. Create the necessary subdirectories and move the file.
Compile it from the c:\java directory using the command
"javac com\javaranch\drive\BeeServlet.java" (without the quotes).
Delete BeeServlet.class from the c:\orion\default-web-app\WEB-INF\classes\ directory.
Verify that it is gone by restarting orion and directing your browser to
http://localhost/servlet/BeeServlet.
Copy com\javaranch\drive\BeeServlet.class to c:\orion\default-web-app\WEB-INF\classes\com\javaranch\drive\
and restart orion. Direct your web browser to
http://localhost/servlet/com.javaranch.drive.BeeServlet
to see your servlet in action.
That's a lot to type, so let me tell you about a way to make it easier
for your users. Open your
c:\orion\default-web-app\WEB-INF\web.xml and
just above the </web-app> tag add:
      <servlet>
        <servlet-name>BeeServlet</servlet-name>
        <servlet-class>com.javaranch.drive.BeeServlet</servlet-class>
      </servlet>
Restart orion and direct your browser to
http://localhost/servlet/BeeServlet.
Can you see the text?
Assignment Servlets-2 (Reverse)
Purpose: To learn how to pass data from a web browser to a servlet and
to learn about packages
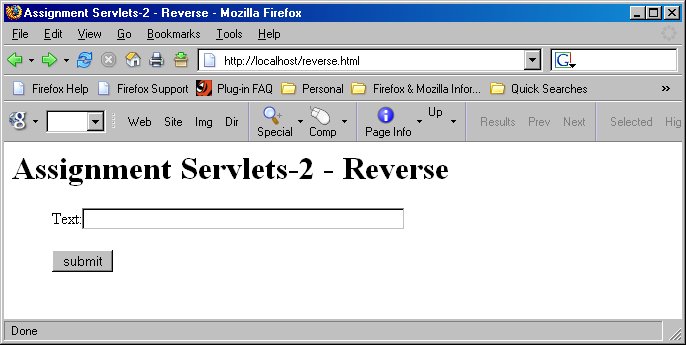
Write a servlet that will take a string and show its reverse.
You will need to create a web page that contains the following HTML fragment:
      <form method='post' action='/servlet/ReverseServlet'>
        Text: <input type='text' name='text' size='50'><br><br>
        <input type='submit' value='submit'>
      </form>
You should be able to direct your browser to http://localhost/reverse.html and
see a page like this:
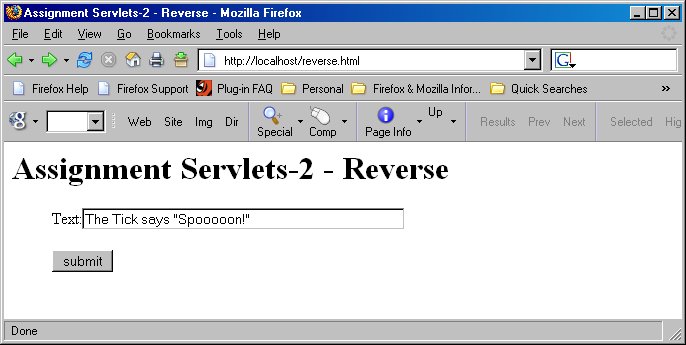
Feed some text into the text field:
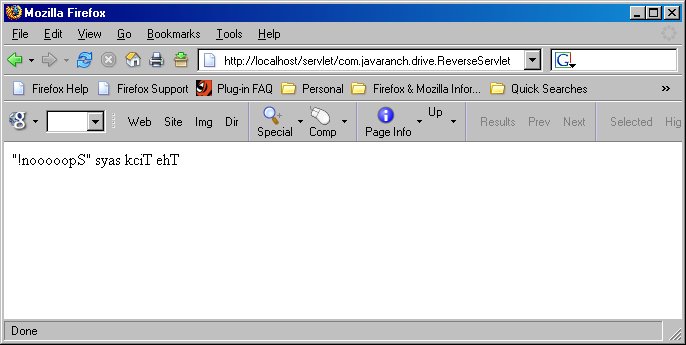
Press the submit button and see the text in reverse:
At this point, any string manipulation you do should be efficient without
sacrificing readability. Remember, every time you concatenate with String,
you create four new objects. Use an alternative to concatenation.
Instructor's solution:
reverse.html: 15 lines
ReverseServlet: 35 lines
JSP
A JSP is an HTML page with the option to embed Java code.
Copy the following code to c:\orion\default-web-app\now.jsp.
    <html>
    <head><title>Now</title></head>
    <body>
      <h1>Now</h1>
      <ul>
        It is now <%= new java.util.Date() %>
      </ul>
    </body>
    </html>
Start orion and go to http://localhost/now.jsp
to see the current date and time.
The first time the JSP is called, the JSP is converted to a servlet,
compiled and run. We prefer to use JSPs for our web pages because most
web pages are just HTML with just a little bit of Java. Putting the HTML code
in your servlet often ends up looking clunky.
The character sequences <%= and %> enclose a "jsp expression".
The evaluated java code is then displayed at this position in the JSP.
One possible variation could be the following:
    <%@ page import="java.util.*" %>
    <html>
    <head><title>Now</title></head>
    <body>
      <h1>Now</h1>
      <ul>
        <%
          Date date = new Date();
        %>
        It is now <%= date %>
      </ul>
    </body>
    </html>
This will look the same in the browser and demonstrates a "jsp scriplet"
(<% and %>) and a "jsp directive"(<%@ and %>).
MVC2
There are lots of bad ways to write a java web app with servlets and/or JSPs.
The generally accepted best practice is to use the MVC2 pattern. Roughly based
on the MVC pattern (model/view/controller) the model is the data, the view is
the JSP and the controller is the servlet. All user data is almost always
submitted to a servlet, and when a servlet is done processing the data,
it always asks the server to load a JSP.
The servlet library provides a great deal of flexibility in services.
I've found that most of the servlets I write use a common subset of those features.
On top of that, nearly all of my servlets had some very common code in them. I moved
this common code into a class called ActionServlet in the JavaRanch common library
that provides a slightly simpler interface.
Using ActionServlet and MVC2, BeeServlet now looks like this:
    package com.javaranch.drive ;

    import com.javaranch.common.* ;

    public class BeeServlet extends ActionServlet
    {

        private class Default implements ActionHandler
        {
            public void doAction( ServletData servletData )
            {
                servletData.setAttribute( "text" , "MVC2-buzz-buzz ..." );
                forward( "/bee.jsp" , servletData );
            }
        }

        public void init()
        {
            addActionHandler( "default" , new Default());
        }

    }
And we are going to need a bee.jsp which contains:
    <html>
     <head><title>Bee</title></head>
     <body>
       <h1>Bee</h1>
       <ul>
         <%=request.getAttribute( "text" )%>
       </ul>
     </body>
     </html>
While this BeeServlet is more complicated than the original BeeServlet,
it does a good job of demonstrating MVC2. As your application becomes larger,
this solution will be simpler than if you just put everything into a
single servlet or JSP.
We need to make sure that when orion runs this program it can find the JavaRanch stuff.
Copy jr.jar
to c:\orion\lib\jr.jar (.jar is the name usually used for a collection of Java
stuff. Sometimes we use .zip on JavaRanch because some browsers will garble
a .jar file when downloaded - orion expects .jar).
Compile BeeServlet and copy it to the orion classes directory as we did previously.
Copy bee.jsp to c:\orion\default-web-app, restart orion and go to
http://localhost/servlet/BeeServlet
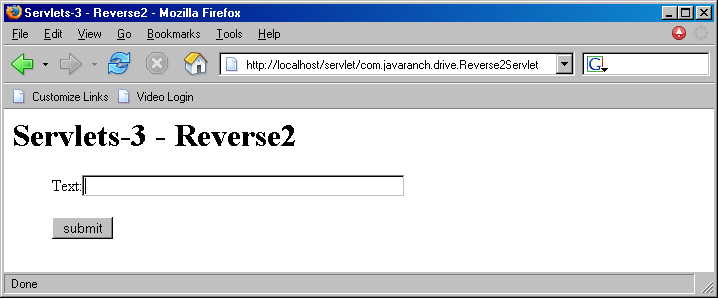
Assignment Servlets-3a (Reverse2)
Purpose: to learn how to generate complete, interactive web pages using
good MVC2 architecture.
Write a servlet that will take a string and show the reverse in the same form.
This way you can continuously submit and see the string reversed over and over.
Every other reversal should show the string forwards.
Direct your web browser to
http://localhost/servlet/com.javaranch.drive.Reverse2Servlet
(or
http://localhost/servlet/Reverse2Servlet
if you've modified your
web.xml file), and see the following form:
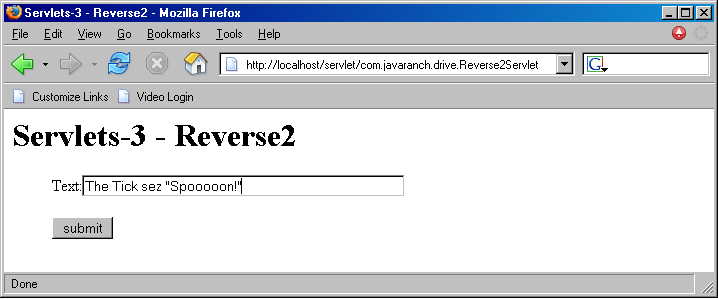
Feed in some text:
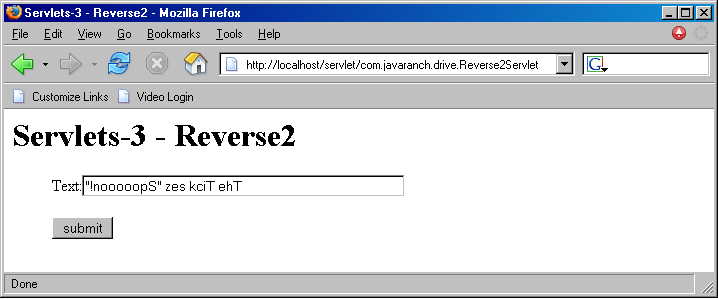
Press "submit" and get the form back with the text reversed:
Clicking "submit" again should give you the original text:
Notes:
You can set the contents of an HTML input tag by introducing the value attribute:
<input type='text' name='text' value='spooooooon!' size='50'>
To put a double quote in your string, use the HTML escape sequence
for double quote """.
To put a single quote (apostrophe) in your string, use the HTML escape sequence
for single quote "'".
Instructor's solution:
Reverse2Servlet.java: 34 lines
reverse.jsp: 13 lines
Making a Standard Web App
Okay, this is gonna hurt a little.
The time has come, young grasshoppa, for you to learn the standard way of putting together
Java web applications. It is not pretty. But you are gonna do it! Or suffer the wrath of the
nitpicker!
As goofy as this is all about to look, it does make things waaaaay easier in the long run.
But for the tiny applications we are writing at this time, it's a whole lot of overkill.
We'll start off just telling you where to put things and as you use it more and more, it should
start to make sense.
Three big changes: war files, directory structure and ant ...
WAR files
As your web app grows, maybe to hundreds of files, it can become a chore to
copy all the files to their proper places to deploy them. Plus, you may want
to share your web app with someone or deploy it on another system.
Java web applications are usually deployed by packaging
them into WAR (Web Archive) files. A WAR,
like a JAR (Java Archive) file is a group
of files that have been zipped (compressed). The ending is changed from
.zip to .jar or .war to indicate what type of files are in the archived file.
Each WAR file contains a deployment
descriptor (web.xml), the Web component files (servlets), and
related resources (HTML, JSP, POJO and image files) in a directory
structure similar to the one we've seen in orion:
The static HTML files and JSPs are stored in the top level directory.
The Servlet and related Java class files must be stored in the WEB-INF/classes directory.
Any auxiliary library JAR files must be stored in the WEB-INF/lib directory.
The deployment descriptor is stored as a file named web.xml in the WEB-INF directory.
This can be a hassle for small web apps, but as your application grows,
it becomes ever more useful to have all the necessary files in one file.
Directory Structure
You may have already experienced some problems with so many files in the same directory,
so we're gonna help you resolve that problem -- beginning by creating more subdirectories. And since
large projects contains hundreds (thousands) of files, we'll create even more subdirectories
to deal with that! But, you know, in a standard sort of way.
Here are few directories to get us started.
     java\bee
             \src                    // production source
                  \java              // java source.  First directory in here is "com"
                  \web               // html, jsp, image and any other files for a web site
             \lib                    // jar files and the like that the project uses
                  \production        // stuff that will need to be copied into production
                  \development       // stuff that is used only during development
                                     //        and should not find its way to production
             \build                  // this dir does not go in version control.
                                     //        frequently deleted and re-created by ant
                  \classes           // compiled production classes
                  \dist              // the final artifacts destined for production.
                                     //        Usually a war file, ear file or jar file.
For now, put BeeServlet.java in the c:\java\bee\src\java\com\javaranch\drive directory.
Then put bee.jsp in the java\bee\src\web directory. Since javaee.jar is used only for compiling,
put javaee.jar in the java\bee\lib\development directory. Put jr.jar into the java\bee\lib\production
directory. The build directory will be generated for you, so you don't have to worry about it.
Ant
You could manage all this with a .bat or shell script file, but Ant
is system independent. The real power of Ant lies in its ability to do an
incremental build. When your application becomes huge, it may take
several minutes to compile all files and zip them up into jar files.
Ant can look at file date and time stamps to determine shortcuts.
So when you do a build, it might take just a few seconds.
Download the latest version of ant from
ant.apache.org. Unzip it to your C:\ directory
and it will create a directory something like "apache-ant-1.6.5" which you may want to
rename to "ant". Add the ant bin directory to your PATH.
Copy the following code to c:\java\bee\build.xml:
    <project name='bee' default='build' basedir='.'>

      <target name='init'>
        <property file='${user.home}/build.properties'/>
        <property name='app.name' value='${ant.project.name}'/>
        <property name='src.dir' location='src'/>
        <property name='lib.dir' location='lib'/>
        <property name='build.dir' location='build'/>
        <property name='classes.dir' location='${build.dir}/classes'/>
        <property name='dist.dir' location='${build.dir}/dist'/>
      </target>

      <target name='initdirs' depends='init'>
        <mkdir dir='${classes.dir}'/>
        <mkdir dir='${dist.dir}'/>
      </target>

      <target name='compile' depends='initdirs'>
        <javac srcdir='${src.dir}/java' destdir='${classes.dir}'>
          <classpath>
            <fileset dir='${lib.dir}/development' includes='javaee.jar'/>
            <fileset dir='${lib.dir}/production' includes='jr.jar'/>
          </classpath>
        </javac>
      </target>

      <target name='war' depends='compile'>
        <war destFile='${dist.dir}/${app.name}.war' webxml='${src.dir}/web/WEB-INF/web.xml'>
          <classes dir='${classes.dir}'/>
          <zipfileset dir='${lib.dir}/production' includes='jr.jar' prefix='WEB-INF/lib' />
          <fileset dir='${src.dir}/web' excludes='WEB-INF/web.xml' />
        </war>
      </target>

      <target name='build' depends='war' description='compile and create the war' />

      <target name='clean' depends='init' description='Use for a clean build'>
        <delete dir='${build.dir}' />
      </target>

      <target name='ffbuild' depends='clean, build' description='clean and create the war'/>

      <target name='deploy' depends='initdirs' description='copy the war file to the app server'>
        <delete verbose='true' dir='${deploy.dir}/${app.name}'/>
        <delete verbose='true' dir='${deploy.dir}/../application-deployments/default/${app.name}'/>
        <delete verbose='true' file='${deploy.dir}/${app.name}.war' />
        <fail unless='deploy.dir' message='build.properties must exist in your home directory and define deploy.dir' />
        <copy todir='${deploy.dir}' file='${dist.dir}/${app.name}.war'/>
      </target>

    </project>
Most ant scripts contain the targets "build" (for "incremental build" -
the default target), "clean" (deletes generated files, forcing a
rebuild of everything when build is run) and
"ffbuild" (clean and build). Usually, you'll just run ant with no paramaters,
thus invoking the default target. Before deploying, you will probably run
"ant ffbuild".
We're finally ready to generate our war file. From the command prompt cd to the
c:\java\bee directory, type "ant" (without the quote marks) and press enter. Watch the fun
begin! After you see "build successful", cd to the c:\java\bee\build\dist directory and
use the command jar tvf bee.war to look at the innards of the bee.war file.
For further information on directory structure, properties
files, and ant targets, refer to
the JavaRanch build standards page.
Deploying to Orion
Create a file named "build.properties" containing one line:
"deploy.dir=/orion/applications" and save it in your home directory.
In Windows this is usually c:\Documents and Settings\<your name>.
If you are using a flavor of Windows that doesn't have that directory, or
you are using another operating system, use
System.getProperty("user.home")); to find your user home.
Run "ant deploy" from the c:\java\bee directory to compile all the
source files, build a "war file" (Web ARchive file)
and deploy it to the proper directory in orion.
Your application is now installed and ready to do its thing. We need to
tell Orion about it.
Add the following line to c:\orion\config\applicaton.xml just under
"<web-module id="defaultWebApp" path="../default-web-app" />":
<web-module id="bee" path="../applications/bee.war" />
Add the following line to c:\orion\config\default-web-site.xml just below
"<default-web-app application="default" name="defaultWebApp"/>":
<web-app application="default" name="bee" root="/"/>
In the c:\java\bee directory, type "ant ffbuild deploy"
Orion is now all set! Restart Orion and direct your browser to
http://localhost/servlet/BeeServlet
to see the message!
Assignment Servlets-3b
Purpose: To learn how to make an ant build script
Write a build.xml for Assignment Servlets-3a.
Assignment Servlets-4a Videos
Purpose: To learn about handling more than one action
Write a web application that allows you to add new movies to an ArrayList
and lists all the movies.
Here is a zip file video.zip containing index.html,
addvideo.jsp, VideoData.java, web.xml, and the ant script to build them.
You will need to examine the jsp closely to understand what parameters
you will need to read. This file introduces HTML radio buttons, checkboxes
and text areas. You can use these files without modification for this project.
Your index.html file should be in the same directory as your jsp files.
Your servlet should be in the com.javaranch.drive.videos package with the
VideoData file.
In your c:\orion\config\default-web-site.xml you will need to change
<web-app application="default" name="bee" root="/"/> to
<web-app application="default" name="videos" root="/videos/"/>
This is a mock up of what your output from
listvideos.jsp will look like. This introduces the HTML table.
I should be able to go to http://localhost/videos/ and see the link to enter your
Videos web application. When I click on the link I should see the list of videos (which
will be empty at that point in time).
Instructor's solution:
listvideos.jsp: 15 lines
VideoServlet.java: 90 lines
Assignment Servlets-4b SecureVideos
Purpose: To learn about securing web applications
Suppose your system needs to be secure. Only people that
know the password are allowed to see any part of it. As
is, almost any page can be loaded if a hacker guesses
the right URL. And there are ways to help with that guessing! :)
Each servlet hides behind the servlet server so that a hacker can only
view what the servlet decides to show.
We could put a password on every request page, but if we're doing a lot
of work, that can get old in a hurry.
We need to arrange our app such that the user provides
the password once and can then use the pages as much as
she likes without providing it again. There's more than
one way to do this.
For this assignment we will use cookies. A simplified view of how cookies work:
- A cookie is a small blob of data that is stored on the client's browser.
- The browser can hold cookies for all the sites the user visits.
- The server writes information to the cookie and reads information from the cookie.
- In general, a server cannot read information that a different server wrote.
Here's how you store data in a cookie:
response.addCookie( new Cookie("favorite_cheese", "extra stinky bloo cheese") );
Note that in this example "response" is of type HttpServletResponse
and "Cookie" is part of the standard servlet stuff.
Here's how you get data out of a cookie:
Cookie[] cookies = request.getCookies();
For each cookie in the cookies array, try to find the one where
cookie.getName() is "favorite_cheese" and then
cookie.getValue() should return "extra stinky bloo cheese".
Note that in this example "request" is of type HttpServletRequest.
Security is an issue that could easily fill a book,
but in this assignment we're going to say that the stuff we're
trying to protect is not very critical,
so this algorithm will be sufficient for this assignment.
Use the instructor's solution from Servlets-4a as your base for this assignment
Your login screen will look like this:
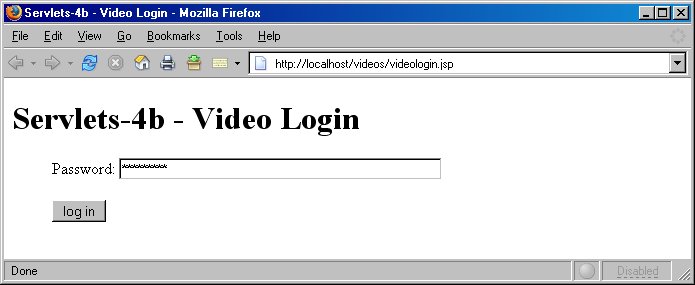
Enter the correct password to see this screen:
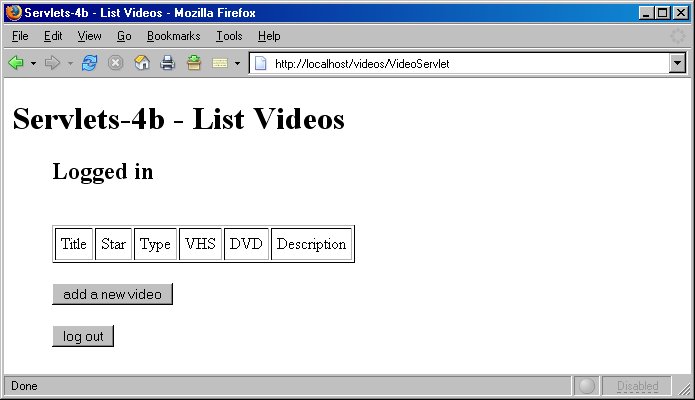
Click on the "add a new video" button to be presented with this screen:
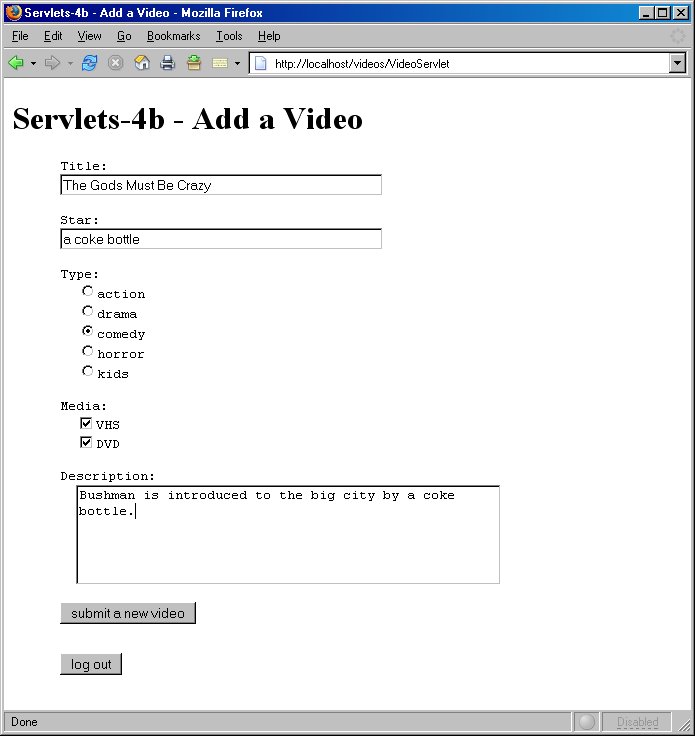
After clicking "submit a new video", you will see:
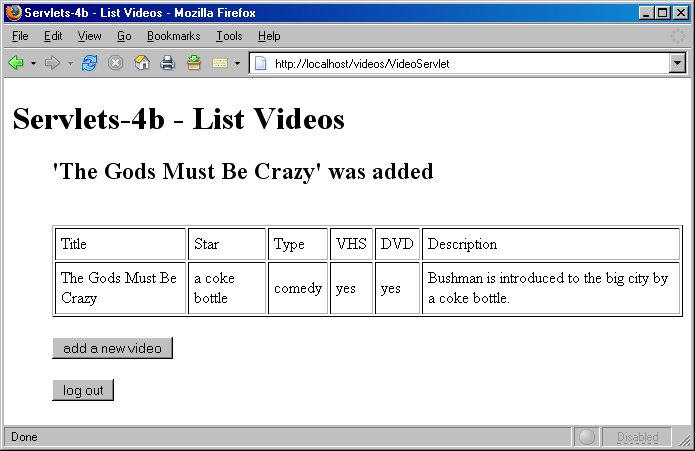
Clicking the "log out" button should take you back to the login screen.
Instructor's solution:
videologin.jsp: 18 lines
addvideo.jsp: 47 lines
listvideos.jsp: 34 lines
VideoData.java: 61 lines (given - use without modification)
VideoServlet: 174 lines
Good for you! Now that you have tied up this assignment, lasso the next one.
JDBC
Page maintained by
Marilyn de Queiroz
|